Raised Bed Construction
Raised bed construction is not that difficult. In fact the only tools used making the one in this article consisted of a single screw driver.
If you have little experience or in my case, no experience at all in carpentry, you
may want to consider this type of raised bed construction for your garden.
Raised Bed Construction Layout
Before you start, put some thought into where you want your raised bed garden located.
All vegetables need sunlight especially tomatoes, so make sure your raised bed will be built in an area of your garden that receives at least six to eight hours of sunlight each day.
If you build near a wall, make sure you have enough room to comfortably walk around all sides of the bed for easy access to your vegetables. This is especially true if you require a wheel chair in your garden.
That said... Let's go ahead and begin our raised bed construction.
Step 1
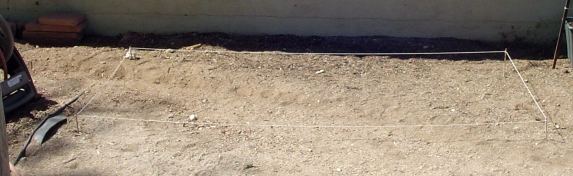
You may have a good idea where you want to build your raised bed garden, but to really visualize how it will look and the space needed; it is a good idea to first do a string layout. If it doesn't look just right, adjust the string layout until you are satisfied.
Note* When I took this picture, I didn't realize the sun light would cause the string to blend in with the ground. However, if you look closely, you can see the string outline.
Step 2
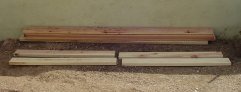
The raised bed garden we will construct will be four feet by eight feet as was the string dimension in the first picture.
I went to Home Depot for the lumber choosing four 8 x 6 x 2 lengths for the sides (as can be seen in the back of the picture).
To construct the ends, I purchased an extra two 8 x 6 x 2 lengths of lumber and had Home Depot cut both in the middle ending up with four 4 x 6 x 2 pieces that I'll use for the ends of the bed.
Step 3
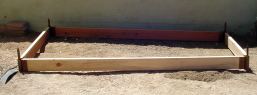
I purchased hinges from a manufacturer on the internet to screw on the end of each piece of lumber. It came with screws requiring the use of only one screw driver.
When the bed frame was put together, I noticed the ground wasn't level and required smoothing so that the bed would be level on the ground.
Step 4
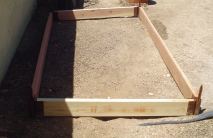
After I leveled the ground and replaced the bed, I noticed after walking around the sides that the garden bed was too close to the wall requiring me to move it out to have a four foot clearance.
The camera shot makes the frame look crooked but it really isn't. You can tell I'm no great photographer.
Step 5
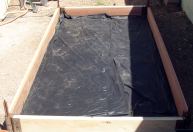
Satisfied with the position of my raised bed garden, I was now ready to lay the bed liner to prevent weeds from growing into the bed.
A really good point worth mentioning, add a layer or two of wet cardboard (or hose it when laid) on top of your liner. Over time, it will break down and by doing so will add nutrients to you soil.
Step 6
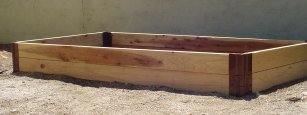
Everything looks good and all that is required to complete the raised bed vegetable garden is adding the second and final layer of lumber.
You can of course, add another third layer to increase height especially if using a wheel chair to make working in the bed more comfortable.
Last but not least, is filling the raised bed garden with good soil.
It is a good idea before you plant to let the soil rest for a couple of weeks to settle. If and when this happens, just top up again to your desired height.
I've added this picture of the raised bed I built in this article filled with soil and a few plants that grew from seedlings and are happy campers.
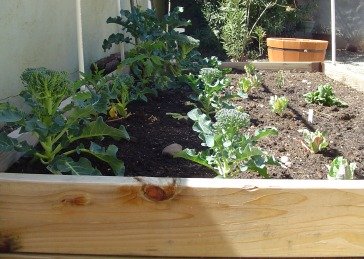
And remember...Don't forget to water your vegetables on a regular basis.
I hope you found this article on raised bed construction informative, and I invite you to read other topics on our site.As an added resource, I've added a link to Missouri University Education Dept to read more information on raised beds.
Happy Gardening
Copyright © 2008-2019 All rights reserved.